
Last Updated: August 20, 2026
Peptide research forms the foundation of advances in drug development, therapeutic discovery, and biochemical innovation. Small mistakes in handling, storage, or documentation can invalidate months of work, waste resources, and lead researchers down false paths. When establishing whether a peptide candidate is genuinely effective or whether results are artifacts of poor handling, precision matters. This guide walks through the most frequent mistakes we see, why they happen, and exactly how to prevent them.
Identification errors are among the most insidious peptide research errors because they can persist undetected through entire experiments. A vial gets swapped, a label fades, or a batch number is transcribed incorrectly. Months later, when results don’t replicate, the root cause traces back to working with the wrong peptide entirely.
Implement a labeling protocol from day one. Use waterproof labels with large, clear text including: peptide name, batch number, date received, molecular weight, and purity percentage from the Certificate of Analysis. Store this information in a digital database as well. When you receive peptides from a supplier like Canada BioGenix, cross-check the physical label against the COA before storing.
A second common error is modified peptides being confused with unmodified versions. If you ordered a peptide with a specific modification (acetylation, amidation, or a non-standard amino acid substitution), verify that the vial you received actually contains that modified version. The supplier’s documentation should specify every modification.
Keep a master inventory spreadsheet recording the date each peptide arrived, the supplier batch number, the purity percentage, and storage location. Update this sheet every time you use a vial. This creates an audit trail that allows you to trace which batch was used if results later seem questionable.
Reconstitution errors represent a major source of downstream problems in peptide research. How you reconstitute a lyophilized peptide determines whether you’re working with a stable, accurately-dosed solution or a degraded, contaminated one.
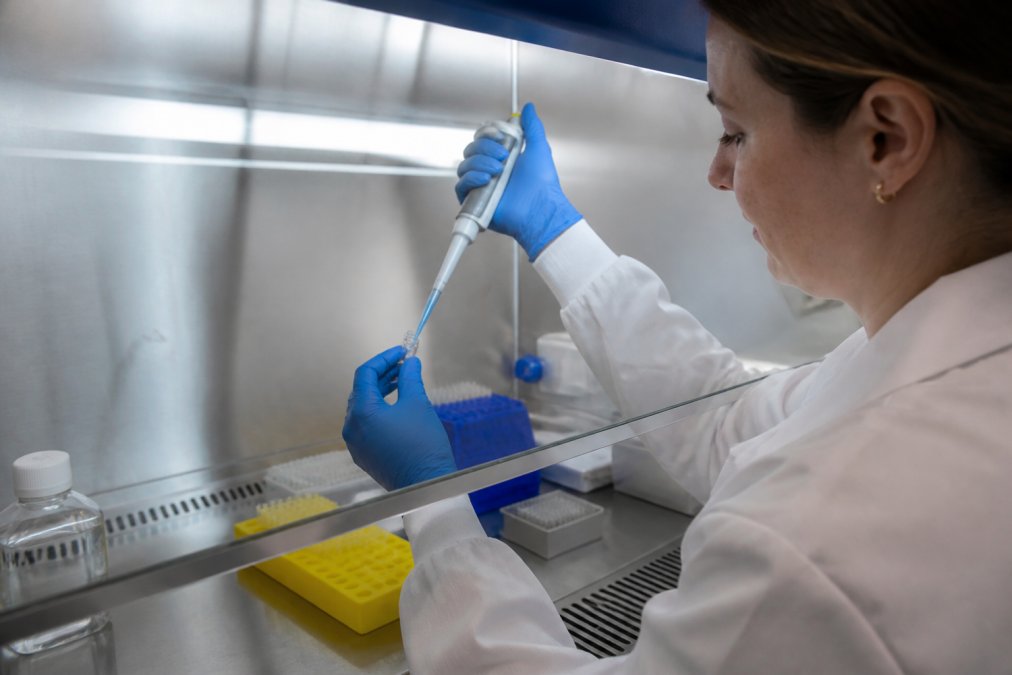
Start with sterile technique. Use a biosafety cabinet or laminar flow hood if available. Sterilize your work surface with 70% ethanol, wear nitrile gloves, and change them between samples. Choose your solvent carefully based on the supplier’s recommendation, some peptides reconstitute better in phosphate-buffered saline (PBS) or in a solution containing acetonitrile or dimethyl sulfoxide (DMSO). Using the wrong solvent can cause the peptide to precipitate or degrade immediately.
Add solvent slowly in stages, allowing the peptide to dissolve gradually. This reduces the risk of clumping or forming insoluble aggregates. Calculate the volume needed for your first experiment plus a small buffer, and avoid reconstituting the entire vial if you only need a fraction. Document the reconstitution date and time on the vial with your initials, as unused reconstituted peptide degrades faster than the lyophilized form.
Storage failures destroy more peptide batches than any other category of error. A peptide that arrives in perfect condition can become unusable within weeks if stored incorrectly.
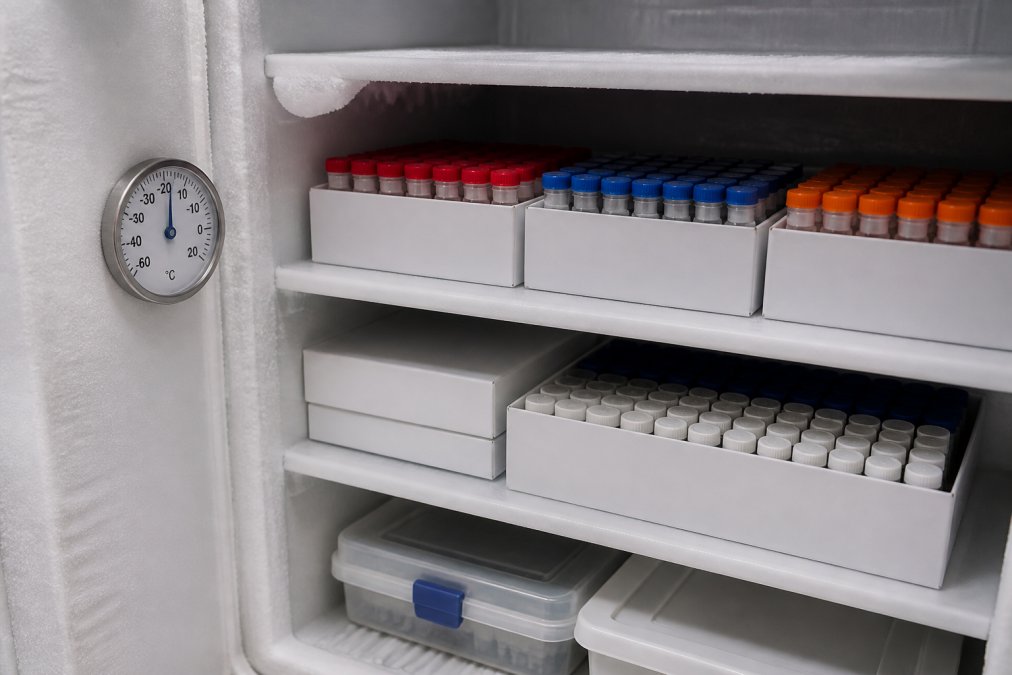
Lyophilized peptides should be stored at -20°C or colder in the back of the freezer where temperature remains most stable, avoiding the freezer door where temperatures fluctuate. Each freeze-thaw cycle stresses the peptide structure, so consider aliquoting into smaller portions immediately after reconstitution and using one aliquot at a time.
Light exposure degrades many peptides, particularly those with aromatic amino acids. Store vials in opaque containers or in a freezer without internal lighting. Moisture is equally critical, lyophilized peptides are stable because they’re dry. Store peptides in airtight containers, and add desiccant packets if you live in a humid climate.
Reconstituted peptides are less stable than lyophilized forms. Most should be used within 1-2 weeks if stored at 4°C, or within 3-6 months if stored at -20°C. Check the supplier’s guidance for exact timeframes. Cold chain management during shipping is often overlooked, request insulated packaging with ice packs or dry ice, and contact the supplier immediately if you suspect a batch arrived compromised.
Concentration calculation errors lead to dosing mistakes, which invalidate entire experiments. The concentration of a reconstituted peptide solution is calculated as:
Concentration (mg/mL) = (mass of peptide in mg) ÷ (volume of solvent in mL)
Confirm the mass of peptide in the vial from the Certificate of Analysis rather than the label. Measure the volume of solvent using a calibrated pipette or graduated cylinder, don’t estimate. Account for the volume occupied by the peptide itself by adding the stated volume of solvent, then topping up to the final desired volume after the peptide dissolves.
Document your calculation including the mass of peptide, volume of solvent, resulting concentration, and date. Many researchers use a spreadsheet to track concentrations across multiple peptides, including columns for peptide name, batch number, mass, solvent volume, calculated concentration, and actual concentration if independently verified.
Contamination and purity issues are often invisible until you run analytical tests. A peptide might look clean but contain impurities that skew your results.
Purity is typically expressed as a percentage determined by high-performance liquid chromatography (HPLC). Request the Certificate of Analysis from your supplier, which should include the purity percentage and impurity profile. Prefer analytically verified purity over theoretical estimates. If the COA doesn’t include detailed impurity information, ask for it.
Common contamination sources include bacterial growth in reconstituted solutions, particulates from improper handling, and degradation products from storage failure. If a reconstituted solution becomes cloudy, discolored, or develops an odor, it’s contaminated, discard it. When ordering from Canada BioGenix, the COAs are backed by our carefully selected manufacturing partners, ensuring consistency and reliability.
Dosing errors often result from concentration miscalculations compounding with administration mistakes. If your actual concentration is 0.9 milligrams per millilitre instead of the calculated 1 milligram per millilitre, a 10% error compounds through your experiments and can shift results enough to draw wrong conclusions.
Use a dosing spreadsheet listing the peptide name, calculated concentration, target dose, volume needed, and administration date. For in vivo studies, document the administration route, timing, injection site, and any observations. Administration errors also include improper injection technique, such as injecting into the wrong tissue or failing to allow the injection site to dry after cleaning with ethanol.
Documentation is where most researchers fall short. Document everything: the batch number, concentration, volume administered, time of day, subject’s conditions, and any deviations from protocol. This information is invaluable when troubleshooting unexpected findings.
Common peptide research errors stem from insufficient documentation, inadequate attention to storage conditions, and underestimated sensitivity to handling details. Researchers who achieve reproducible, reliable results treat every step, from receiving the peptide through to final analysis, as part of a cohesive quality system.
Canada BioGenix supports this commitment to precision by providing research-grade peptides with detailed Certificates of Analysis, comprehensive stability data, and transparent documentation of our manufacturing processes. When you start with a high-quality, well-characterized peptide and apply the best practices outlined here, the likelihood of errors drops dramatically. Get started with Canada BioGenix and build the foundation for reproducible, reliable peptide research.
The most frequent reconstitution errors include using non-sterile water or buffers, failing to allow peptides to hydrate fully before mixing, introducing air bubbles during resuspension, and not accounting for the peptide's molecular weight when calculating concentration. Many researchers also overlook pH stability, using unbuffered water can cause rapid degradation. Proper technique requires sterile, distilled water or pharmaceutical-grade buffers, gentle mixing without vigorous shaking, and allowing 10-15 minutes for complete hydration before use.
Peptides degrade when exposed to temperature fluctuations, light, and moisture. Freeze-thaw cycles are particularly damaging; each cycle introduces ice crystal formation that disrupts the peptide structure. Storage above -20°C accelerates degradation exponentially, while exposure to room temperature can reduce potency by 10-15% per week. Humidity causes peptide oxidation and aggregation. Proper storage requires a dedicated -20°C freezer or preferably -80°C for long-term stability, with desiccant packs and opaque, airtight vials to block light and moisture.
Low-purity peptides introduce impurities and deletion peptides that generate false positive hits and skew results. Impurity profiles containing related compounds can trigger unintended biological pathways, masking true efficacy data and creating misleading safety conclusions. Low-purity batches also lack batch consistency, making replication impossible and wasting research time and funding. Analytical characterization and independent third-party testing confirm purity above 90%; anything lower introduces systematic bias that invalidates downstream research.
Consistency requires three elements: standardized protocols for handling and dosing, batch-specific Certificates of Analysis from your supplier, and documented cold chain management throughout storage and transit. Use the same peptide batch for all experimental replicates when possible, maintain detailed records of reconstitution dates and conditions, and verify amino acid sequence and molecular weight before use. Establish equipment calibration routines for scales and pipettes, and conduct stability testing on your specific storage conditions to catch degradation early.
This article was written using GrandRanker